
Wednesday, October 8, 2014
Holiday Home Christmas
The Holiday Home stamp set is one of my favorite ones right now. It is so versatile and fits so many different occasions. I love how you can decorate the houses with the little wreath or the string lights and then cut them out with the matching dies. And isn't the street lamp the cutest stamp ever? Oh no, wait, I think Santa and his reindeer is even cuter.
Sunday, October 5, 2014
HSS Sketch Challenge #195
This weeks challenge at Hand Stamped Sentiments really spoke to me.

It did not take me long to put the design of the card together. The sequins are from the September Paper Pumpkin kit. The stars actually sparkle beautifully, the picture really doesn't do them justice. I colored the Dazzling Diamonds Glimmer Paper with Blendabilities so the it matches the color theme of the card.


It did not take me long to put the design of the card together. The sequins are from the September Paper Pumpkin kit. The stars actually sparkle beautifully, the picture really doesn't do them justice. I colored the Dazzling Diamonds Glimmer Paper with Blendabilities so the it matches the color theme of the card.
Friday, September 26, 2014
Galaxy Birthday Star Shaker

Today's card turned out to be the perfect match for the Fab Friday 51 sketch, so I thought I would play along. I just turned the sketch 90°.

I saw a tutorial on Jennifer McGuire's blog on how to create a night sky and I really liked the look of the background she created. I did not have embossing paste nor did I have any of the other materials she used so I had to get creative and change quite a few things to create the look. In the end I put my own personal twist on it and I am thrilled with how it turned out.
I started by embossing my Whisper White cardstock with the Lucky Stars TIEF from the new Holiday catalog. Then I applied Pacific Point, Night of Navy, Rich Razzleberry and Blackberry Bliss ink over the entire paper with a sponge dauber. I rubbed a lot of ink onto the cardstock making sure the colors are well blended. Then I used a brush, dipped it into Vanilla Shimmer Smooch Spritz and flicked it onto the paper. I repeated the same process with pure water to create some more subtle blotches.
For the ribbon I cut off the sides from the 1/8" Silver ribbon and pulled it apart. The little glitter star that I added to the sentiment is colored with a Blendability marker to match the Crushed Curry of the shaker star. The star confetti is punched from Rich Razzleberry, Pacific Point and Silver Glimmer cardstock with the Confetti Star punch. Add some rhinestones for even more bling, DONE.

I love how the ribbon mimics the spiral of a galaxy.

Same layout, completely different card. For today's card I used the same layout as for my Star Thank You card in my post on September 10th and basically just changed the color combo. It is amazing how that can transform the entire card and make it look sooooo different. Compare both star cards side by side and see how different they turned out just by changing the background.

Leave me a comment ant let me know which one you like better, I can't decide LOL.
Tuesday, September 23, 2014
Kinda Eclectic - More Display Stamper Projects

Some more samples I submitted for the display boards at convention this year. All of these feature the stamp set Kinda Eclectic.
This was one of my 3D samples. I stamped directly on the Mini Muslin Bag and added a tag.


The Chalk Talk Framelit was the perfect frame for the leave stamp. I layered the Famelit underneath the card stock with the cutting edge facing away from the card stock and ran it through the Big Shot. Voilà, embossed a cute little frame.

For this card I used the emboss resist technique. First I stamped the leaves with Versamark and embossed with clear embossing powder. Then I stamped the leaves with Tango Tangerine and stamped again without re-inking the stamp to achieve a more faded look.

There are more samples I have not posted yet so come back soon :-). Thanks for stopping by today!
2013-2014 Convention Display Stampers
Wednesday, September 10, 2014
Star Thank You - HSS Color Challenge #194
When I came across this weeks challenge over at Hand Stamped Sentiments the colors really spoke to me. Yellows and blues together are always fun. I did not have to think long about how my card was supposed to look like, it all came together right in front of my eyes. the new Confetti Star Punch from the Holiday Catalog just screams shaker card in my opinion and so here we go with another one.

Thursday, September 4, 2014
White Christmas Rudolph
Shaker cards are always fun. And the split second I spotted the new Confetti Stars punch in the Holiday catalog I knew I had to make one with those adorable little stars. For the snow globe picture I used the stamp set "White Christmas". Rudolph's little red nose is a Basic Pearl that is colored with the Cherry Cobbler Blendabilitites. Thanks for stopping by today.


Monday, September 1, 2014
Holiday Home Halloween
There are so many fun things in the new Holiday catalog, I really had a hard time deciding what to create with first. The Holiday Home stamp set is so versatile and can be used for way more than just Halloween and Christmas. For starters I created a Halloween card though. I used the coordinating die cuts for the houses and layered them with lots of Dimensionals to give the card some depth.

Sunday, August 3, 2014
Amazing Birthday

Some more samples I made for the convention display boards. All of these feature the set "Amazing Birthday".


Thursday, July 24, 2014
More Display Board Samples

Todays samples feature a new stamp set from the upcoming holiday catalog. It's called Seasonally Scattered and will be available for costumers on August 28th, 2014.


Tuesday, July 22, 2014
Kinda Eclectic
Welcome back to some more samples I made for the convention display boards. I am going to continue with the Kinda Eclectic stamp set today.

For this card I inked up the sun stamp first with Versamark and then Daffodil Delight. After stamping the image on Whisper White card stock I covered it with clear embossing powder and heat embossed. Since now the Daffodil Delight ink is sealed I was able to sponge and brayer right over it.
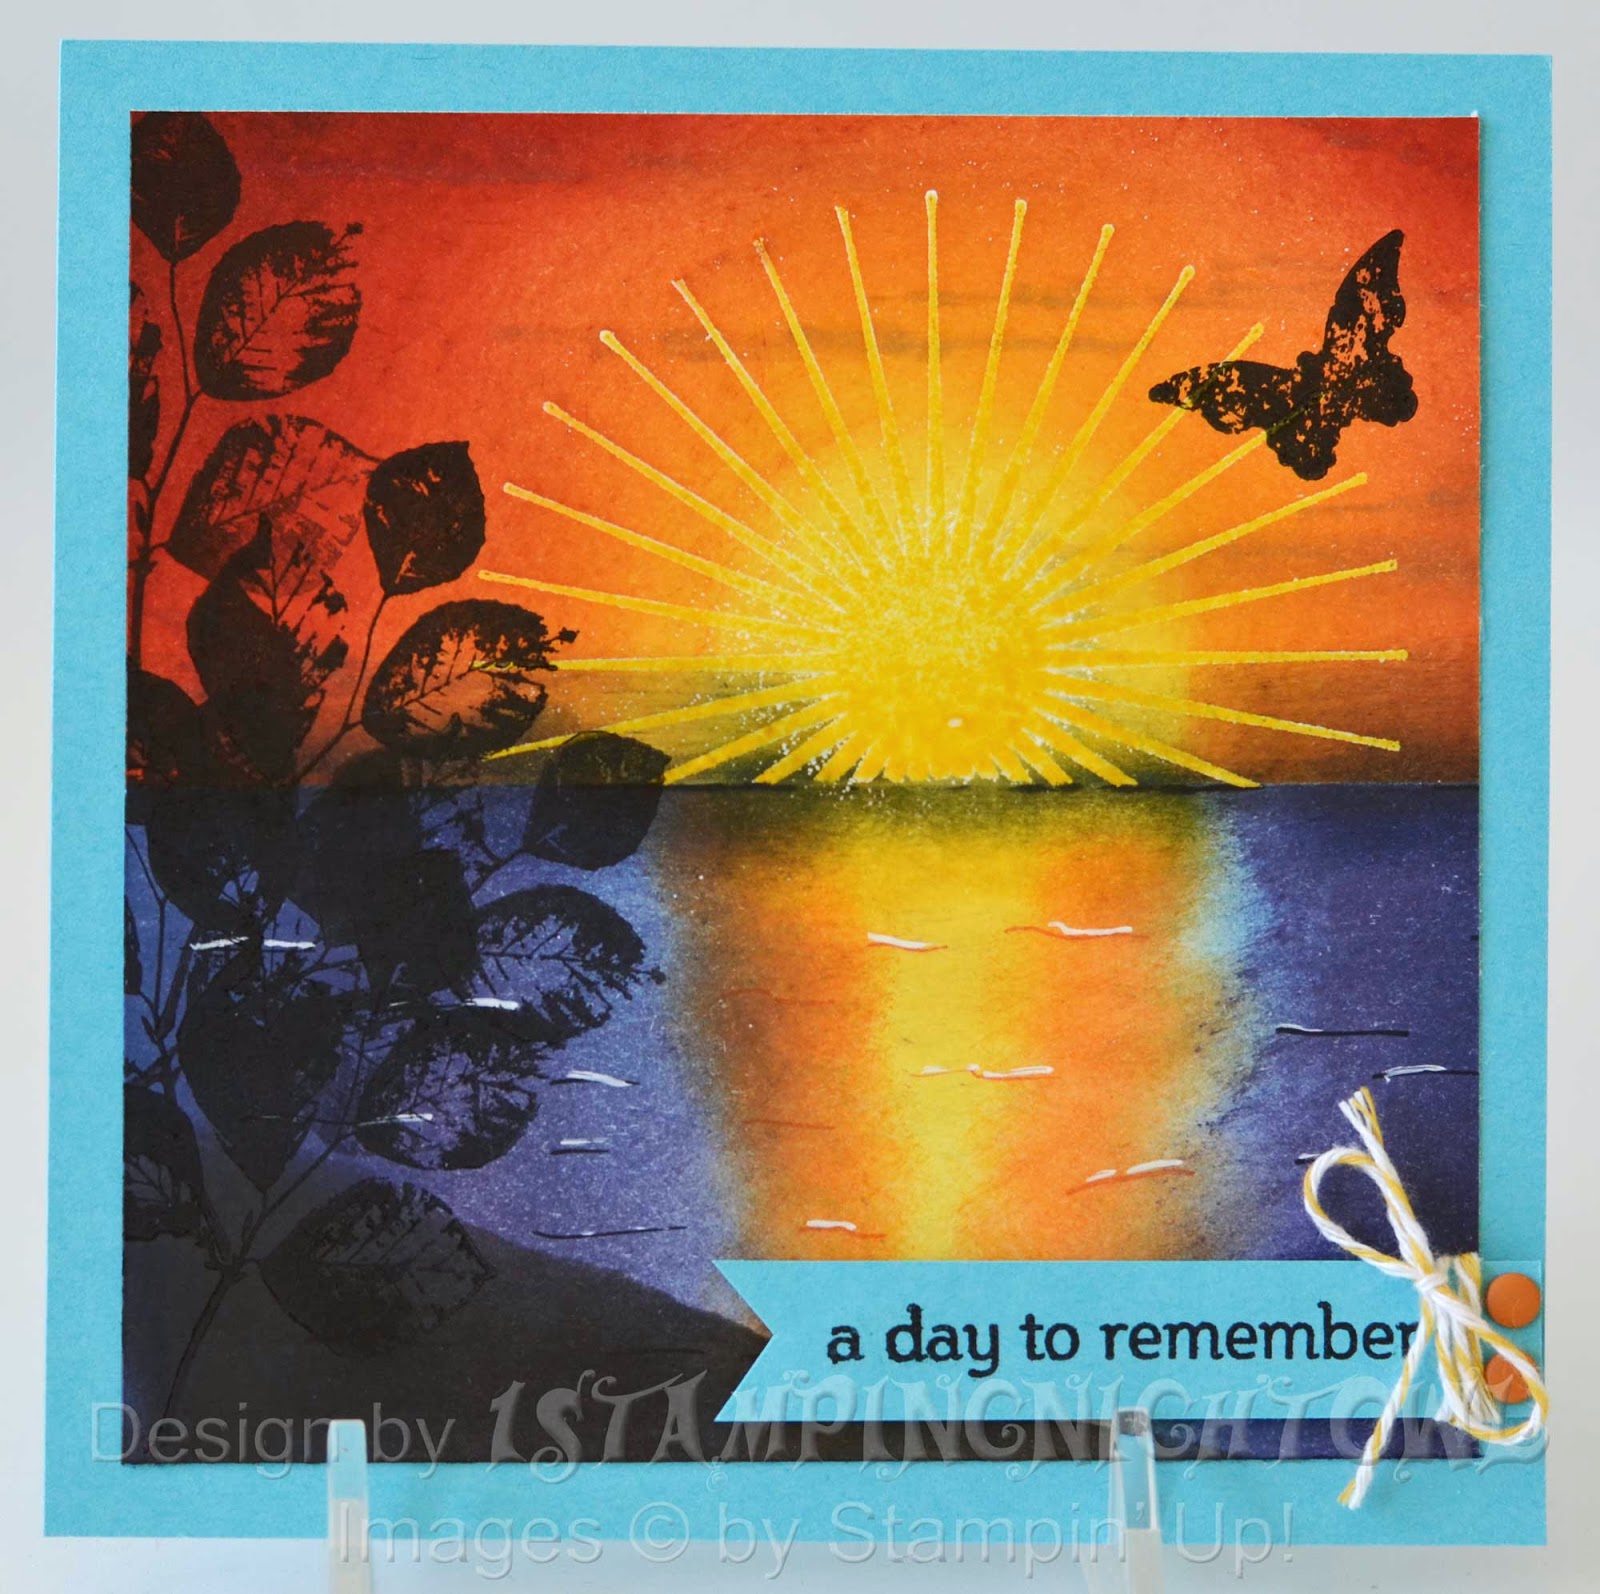


For this card I inked up the sun stamp first with Versamark and then Daffodil Delight. After stamping the image on Whisper White card stock I covered it with clear embossing powder and heat embossed. Since now the Daffodil Delight ink is sealed I was able to sponge and brayer right over it.
I love how the red rose on this card really pops. I made it with the Simply Pressed Clay and Blossoms Mold. After the clay had dried I simply colored it with a Real Red marker.
For this card I stamped the butterflies on Vellum card stock and punched them out with the coordinating punch. It is hard to see on the photo but the Tempting Turquoise butterfly is glittered up with Iridescent Ice embossing powder. I also added some rhinestones. Can't have enough bling right?
Monday, July 21, 2014
Convention 2014 Display Board Samples
Once again I had the honor of being chosen to create samples for the display boards at Stampin' Up! convention in Salt Lake City last week. I was thrilled to be part of this group of amazingly talented stampers. We had to create 24 samples for the three stamp sets "Kinda Eclectic", "Amazing Birthday" and "Seasonally Scattered" (which will be available in the upcoming Holiday catalog).

I am so excited I can finally share my projects. So in the coming weeks I will post pictures of the samples I created.


I am so excited I can finally share my projects. So in the coming weeks I will post pictures of the samples I created.
I will start off with a card I created for the "Kinda Eclectic" board. Love that stamp set.
The sentiment is stamped with StazOn on a Window sheet. Also the clouds and butterflies are mounted on Window Sheet. Cutting the Window Sheet a little longer than the card base curves the Window Sheet when you tuck the ends under the card stock and gives the card a lot of dimension, almost makes it kind of 3D.
Please check out the beautiful work of all the other Display Stampers. You can either click on the Inspire Create Share button above to see all the amazing artwork on one pinterest board or on the links below to visit the individual blogs of this year's Display Stampers.
2013-2014 Convention Display Stampers
Saturday, June 21, 2014
June Paperpumpkin
I just received my June Paper Pumpkin and found the cutest project in the box. What is a "Paper Pumpkin" you might wonder. It's a monthly subscription for a surprise project. Everything you need to complete the project like paper, stamps, ink, accessories, and more is in the box (except for scissors and adhesive). All the material is color coordinated, pre-cut and scored if needed. You can either follow the detailed instructions in the kit or get creative. For more information click on the Paper Pumpkin logo below:


Enough talking, let's reveal what I made with my June Paper Pumpkin:
The June 2014 kit includes:
- Pinwheel Party Photopolymer Stamp
- Night of Navy Classic Stampin' Spot
- 24 precut Designer pinwheel forms
- 24 paper straws
- 20 Whisper White Banners
- 24 cellophane bags
- Basic Grey Baker's Twine
- 24 Silver Brads
- 24 Silver clips
- 96 Mini Glue Dots
Tuesday, June 17, 2014
Bloom with Hope and Blendabilities
The stamp set "Bloom with Hope" is the perfect set to use with the new Blendabilities. It's one of the hostess sets in the new catalog. For this card I used the masking technique to layer the flowers on my card stock.


Tuesday, June 10, 2014
Tap Tap Tap Blendabilities
It's here! The box with my new catalog items arrived. And I am having fun creating with them. Isn't that typewriter stamp set "Tap Tap Tap" so cute? I took the sample in the catalog as my inspiration and then put my personal touches on the card.The new Blendabilities are so awesome to work with. Fun, fun, fun!!! I really like how that button string closure on the left turned out.


Monday, June 2, 2014
New In Color Birthday
Wahooo!!!! It's finally here. What am I talking about? THE NEW CATALOG!!!! So much fun stuff.
I made a fun card that showcases all the new in colors and the stamp set "Amazing Birthday".


Browse the new catalog and get inspired by clicking on the picture below.
I made a fun card that showcases all the new in colors and the stamp set "Amazing Birthday".
Subscribe to:
Posts (Atom)
Follow me on Instagram
This blog has been my window to the world to showcase my artwork ever since I started my creative journey. In recent years Instagram has gai...

-
 Here they are, all four of my Halloween characters that I made from the Candy Wrapper Die (120890). I used the pumpkin as an example for the...
 -
 Stampin' Up! is offering demonstrators the opportunity to stamp projects for event display boards. To apply two 3-D objects, three card...
 -
 Finally! ..... The wait is over, at least if you are a demonstrator. Stampin' Up! revealed the new Holiday catalog at convention in Jul...